
Bathroom Tiling for Rentals: Expert Step-by-Step Guide
Bathroom Tiling for Rentals: Expert Step-by-Step Guide
Over 60 percent of british rental bathrooms develop moisture issues within the first year if tiled surfaces are not properly prepared. For landlords and tenants alike this is more than just an eyesore. Moisture problems can lead to expensive repairs and shorten the lifespan of your investment. Understanding the right steps for tiling a british rental bathroom helps you achieve a durable finish that stands the test of time, from the first inspection all the way to final checks.
Table of Contents
- Stage 1: Assess And Prepare The Rental Bathroom Surface
- Stage 2: Select And Purchase Suitable Tile Materials
- Stage 3: Lay Out And Cut Tiles For Optimal Fit
- Stage 4: Apply Adhesive And Position Tiles Accurately
- Stage 5: Grout, Seal, And Clean The Tiled Area
- Stage 6: Inspect And Finish For Tenant-Ready Quality
Quick Summary
| Key Point | Explanation |
|---|---|
| 1. Thoroughly assess the surface first | Inspect for damages and moisture risks to ensure proper tile adhesion and longevity. This is fundamental to prevent future problems. |
| 2. Choose suitable tile materials wisely | Select tiles based on durability, moisture resistance, and maintenance needs. Prioritise practical features alongside aesthetics for lasting performance. |
| 3. Ensure precise tile layout and cutting | Start by establishing reference lines for a straight layout. Use accurate cutting tools for a professional finish and minimal waste. |
| 4. Apply adhesive and position tiles carefully | Use notched trowels for consistent adhesive application. Maintain alignment and ensure no air pockets to achieve a seamless appearance. |
| 5. Complete with grouting and sealing | Properly grout and seal tiles to prevent moisture infiltration and staining, ensuring long-term protection and good looks. |
Stage 1: Assess and prepare the rental bathroom surface
Before diving into bathroom tiling, thoroughly assessing and preparing the surface is crucial for achieving a professional finish that will withstand the moisture and wear typical in rental properties. A meticulous preparation process ensures your tiles will adhere correctly and remain durable throughout tenancy periods.
Start by conducting a comprehensive surface inspection. Look for any existing damage such as cracks, unevenness, or water stains on walls and floors. Pay special attention to areas around the bath, shower, and sink where moisture exposure is highest. Preparing bathroom surfaces requires careful evaluation to prevent future tiling failures. Gypsum plasters are unsuitable for persistently wet areas, so consider alternative substrates that can handle continuous moisture exposure.
For walls surrounding baths and showers, implementing a robust waterproofing strategy is essential. The NHBC guidelines recommend using appropriate tanking systems to create a watertight barrier and prevent water ingress. This means applying a waterproof membrane or specialised coating before tiling to protect the underlying structure. Clean the surface thoroughly, removing any old adhesive, grease, or loose paint. If the surface is uneven, use a self-levelling compound to create a smooth, stable base that will support your new tiles perfectly.
Warning: Skipping proper surface preparation can lead to tile failure, water damage, and costly repairs for landlords. Take time to get this foundational stage right.
Stage 2: Select and purchase suitable tile materials
Selecting the right tile materials is a critical step in creating a durable and attractive rental bathroom that can withstand frequent use and moisture exposure. Your choice of tiles will impact not just the aesthetic appeal but also the long term performance and maintenance requirements of the space.
When choosing bathroom tiles, consider different material characteristics carefully. Ceramic and porcelain tiles offer distinct advantages for rental properties. Ceramic tiles are affordable and easy to cut making them suitable for wall applications and light traffic areas. Porcelain tiles provide superior water resistance and density perfect for floors and high moisture zones. Natural stone tiles like marble or slate can add luxury but require more maintenance and come with a higher price point.
Prioritise practical considerations alongside aesthetic preferences. Examine slip resistance ratings particularly for floor tiles to ensure tenant safety. Lighter coloured tiles can make smaller rental bathrooms feel more spacious while darker tones hide potential dirt and wear more effectively. Consider purchasing extra tiles approximately 10% more than your measured area to account for cuts breakages and future repairs. This proactive approach will save potential replacement hassles down the line.
Warning: Always purchase tiles from reputable suppliers and check each tile for consistent colour and quality before final installation to prevent unexpected variations in your finished bathroom.
Stage 3: Lay out and cut tiles for optimal fit
Tile layout and cutting requires precision and careful planning to achieve a professional finish in your rental bathroom. This crucial stage transforms your tile selection into a seamless installation that looks both aesthetically pleasing and structurally sound.
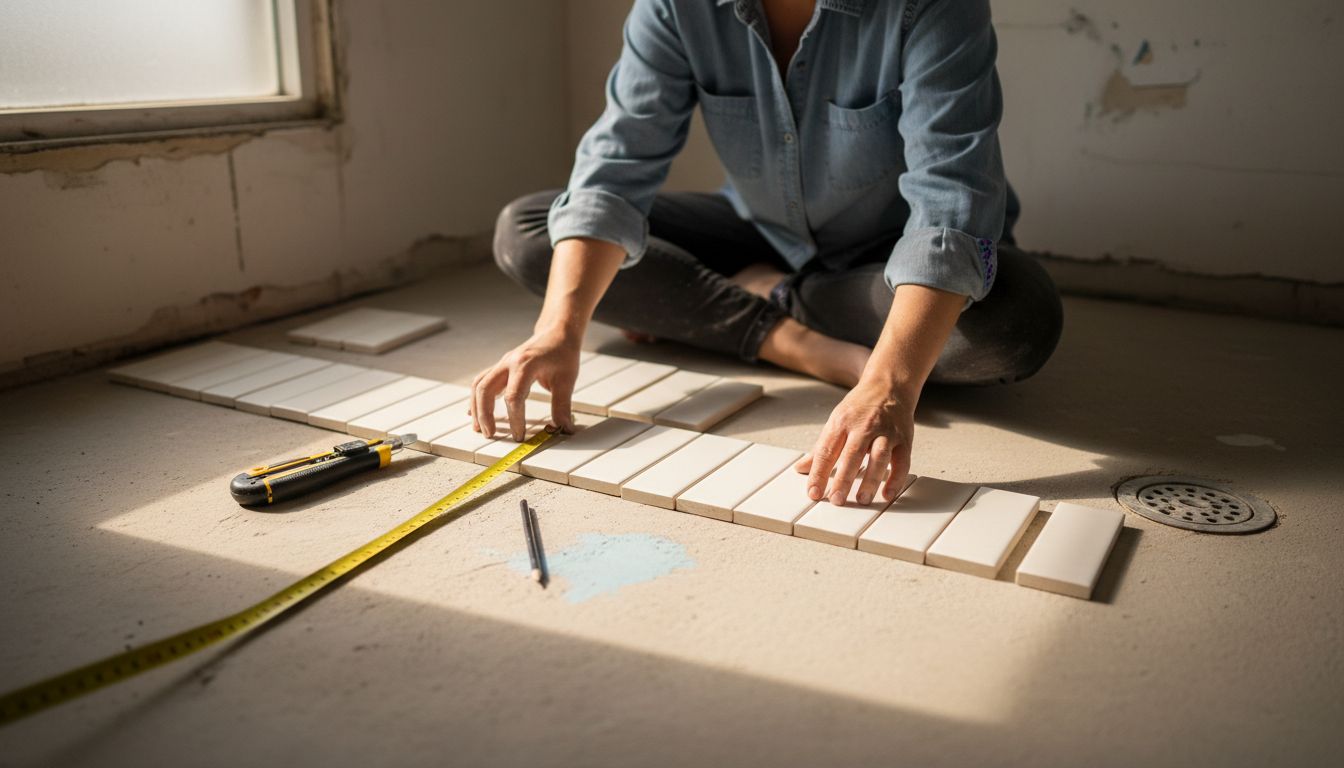
Proper tile layout begins by identifying the lowest point of your surface and establishing a perfectly level reference line. Use a spirit level to draw a horizontal line that will guide your first row of tiles. This foundational line ensures your entire tiling project remains straight and symmetrical. For vertical alignment, draw a plumb line one tile width from the edge to maintain consistent spacing and prevent crooked tile placement.
Cutting tiles requires precision tools and technique. Invest in a quality tile cutter or wet saw for clean cuts around fixtures like toilet bases or sink areas. Measure twice and cut once to minimise waste and ensure accurate fitting. Remember to wear safety glasses and use a dust mask when cutting tiles. For complex cuts around pipes or irregular shapes, create paper templates first to guide your cutting process.
Warning: Always leave a small expansion gap around the room’s perimeter to accommodate natural movement and prevent tile cracking. This tiny space will be hidden by skirting boards or grout, ensuring a professional finish.
Stage 4: Apply adhesive and position tiles accurately
Applying adhesive and positioning tiles requires meticulous attention to detail and a steady hand to ensure a professional finish in your rental bathroom. This critical stage transforms your carefully prepared surface into a stunning tiled environment that will impress tenants and withstand years of use.
After preparing the surface, apply adhesive systematically using a notched trowel, working in small manageable sections. Hold the trowel at a 45 degree angle to create consistent ridges of adhesive that will provide optimal tile coverage. Press each tile firmly into place, aligning carefully with your previously established guide lines. Use tile spacers to maintain uniform gaps between tiles ensuring a professional and symmetrical appearance.
Precision is key when positioning tiles. Work methodically across the surface, periodically checking that tiles remain level and properly aligned. Use a rubber mallet to gently tap tiles into place if needed, ensuring they are fully bedded into the adhesive without leaving air pockets. For complex areas around fixtures, make careful cuts beforehand to ensure a seamless fit. Clean any excess adhesive immediately with a damp cloth to prevent it from hardening and ruining your finished surface.
Warning: Never rush this stage. Work slowly and deliberately, checking alignment and level frequently to avoid costly mistakes that could compromise the entire tiling project.
Stage 5: Grout, seal, and clean the tiled area
The final stage of bathroom tiling transforms your meticulously installed tiles into a polished professional finish that will enhance the rental property’s aesthetic appeal and durability. This crucial process involves precise grouting, protective sealing, and thorough cleaning to ensure long lasting results.
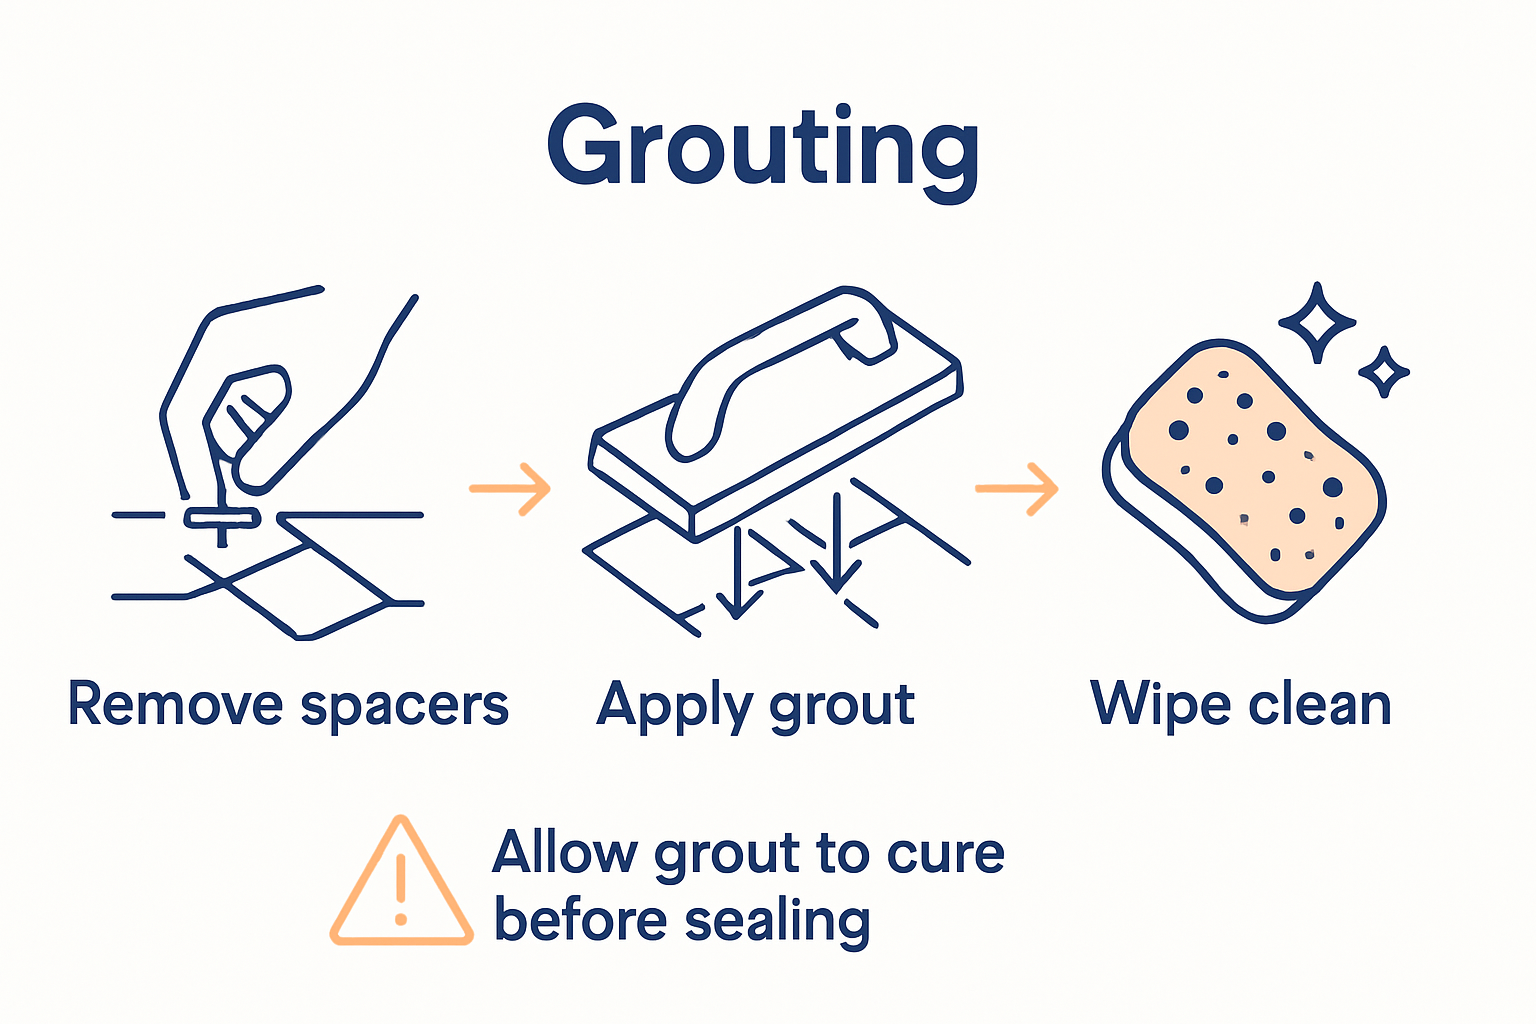
After removing tile spacers, apply grout systematically using a rubber float, pressing the material firmly into the tile joints. Hold the float at a 45 degree angle to ensure complete coverage and remove excess grout immediately with a damp sponge. Work in small sections to prevent the grout from hardening before you can clean it properly. Allow the grout to cure completely typically 24 to 48 hours depending on the product and environmental conditions.
Once the grout has fully dried, apply a high quality penetrating sealant to protect against moisture and staining. This additional layer creates a barrier that prevents water penetration and makes future cleaning easier. Use a foam applicator or brush to distribute the sealant evenly across the entire tiled surface, paying extra attention to grout lines. Allow the sealant to dry completely before exposing the area to water or heavy use.
Warning: Never skip the sealing process. Unsealed grout and tiles are vulnerable to moisture damage, staining, and rapid deterioration especially in high humidity environments like rental bathroom spaces.
Stage 6: Inspect and finish for tenant-ready quality
The final inspection stage transforms your tiling project from a technical installation to a professionally finished rental bathroom space. This crucial phase ensures every detail meets high standards of quality and durability that will satisfy tenants and protect your property investment.
Conduct a comprehensive visual and tactile inspection of the entire tiled area, checking for any potential issues. Look closely for uneven tile edges, gaps in grout lines, or areas where adhesive might not have been fully removed. Run your hands carefully across the surface to detect any subtle irregularities that might not be immediately visible. Pay special attention to corners, edges, and areas around fixtures where precision is most challenging.
Clean the tiled surface thoroughly using appropriate cleaning products designed for your specific tile type. Remove any remaining grout haze or adhesive residue using a specialised tile cleaner and soft cloth. Ensure all surfaces are spotless and shine with a professional finish. Take photographs of the completed work as a record of the installation quality and to compare with future condition reports. This documentation can be valuable for tracking maintenance and potential damage during tenancy.
Warning: A rushed final inspection can lead to overlooked imperfections that may become more pronounced over time. Take your time and be meticulous to guarantee a flawless finish that will impress both current and future tenants.
Transform Your Rental Bathroom with Confidence and Style
Taking on bathroom tiling for rental properties can be challenging. You need durable tiles that resist moisture and wear while delivering a flawless finish that lasts. At the heart of success lies careful surface preparation, precise tile selection, and expert installation techniques as highlighted in the guide. We understand how vital it is to select the right materials that combine practicality and beauty under constant tenant use.

Explore our wide range of premium tiles at Vivido Tiles where affordability meets quality. Whether you prefer the water-resistant strength of porcelain or the elegant touch of marble effect tiles, we provide solutions designed for rental bathroom success. Visit our New Tile Showroom in Harrogate to see collections in person or shop online for convenient free UK delivery. Start your project with confidence today and achieve the expert finish your rental deserves.
Frequently Asked Questions
How should I assess the bathroom surface before tiling?
Before tiling, thoroughly inspect the surface for damage such as cracks or water stains. Look especially around high-moisture areas like the bath and shower, and apply a self-levelling compound if needed to ensure a smooth base for the tiles.
What types of tiles are best for rental bathrooms?
For rental bathrooms, ceramic and porcelain tiles are generally the best options due to their affordability and durability. Consider slip resistance ratings for floor tiles and aim to purchase about 10% more tiles than the measured area to cover any cuts or breakages.
How do I properly cut tiles for an accurate fit?
To cut tiles accurately, use a quality tile cutter or wet saw, and measure twice before cutting to avoid waste. Work methodically, creating paper templates for complex cuts around fixtures to ensure a seamless fit.
What is the proper way to apply adhesive and position tiles?
Apply adhesive using a notched trowel at a 45-degree angle, working in small sections. Use tile spacers to maintain consistent gaps between tiles, and check for alignment regularly to ensure a professional finish.
How can I ensure the grout and sealing process is effective?
Apply grout using a rubber float, ensuring it is pressed firmly into the joints and excess is cleaned immediately. After the grout cures, seal the tiled area with a high-quality sealant to protect against moisture and staining, allowing it to dry completely before use.
What should I check during the final inspection of the tiling work?
During the final inspection, look for uneven edges, gaps in grout lines, and clear any adhesive residue. Conduct a detailed visual and tactile inspection to ensure everything meets high-quality standards, and clean the surface thoroughly for a polished finish.
Recommended
- Wall Tiling Tutorial: Achieve Flawless Results Step-by-Step - Vivido – Vivido Tiles
- Tiling your bathroom Guide by Vivido Tiles Harrogate
- Wall Tiling Tutorial: Achieve Flawless Tiling Results - Vivido Tiles
- Wall Tiling Steps for a Perfect Finish: Complete Guide - Vivido Tiles
- 7 Budget-Friendly Kitchen Backsplash Trends for Ottawa Homes